Install Adobe Creative Cloud Applications
Adobe Creative Cloud includes applications for a wide variety of purposes, including PDF editing, video production, photo editing, web design, and much more. Visit Adobe Learn for more information and for free tutorials in the Adobe Digital Academy.
If you do not have Adobe Creative Cloud installed on your computer, visit Install Adobe Creative Cloud Desktop | Information Technology at Sonoma State University to complete the installation before continuing.
(Note for Mac users: Creative Cloud applications require Mac OS 10.13 High Sierra or later. Apple provides instructions to determine which Mac OS version you are running.)
- Open Creative Cloud.
- You may have an Adobe Creative Cloud shortcut on your desktop. If so, double-click that. If not, launch Creative Cloud using the following instructions.
- On a Mac, open your Applications menu, then find and launch Adobe Creative Cloud.
- On a Windows PC, click the Start Button (Windows logo), then find and launch Adobe Creative Cloud.
- You may have an Adobe Creative Cloud shortcut on your desktop. If so, double-click that. If not, launch Creative Cloud using the following instructions.
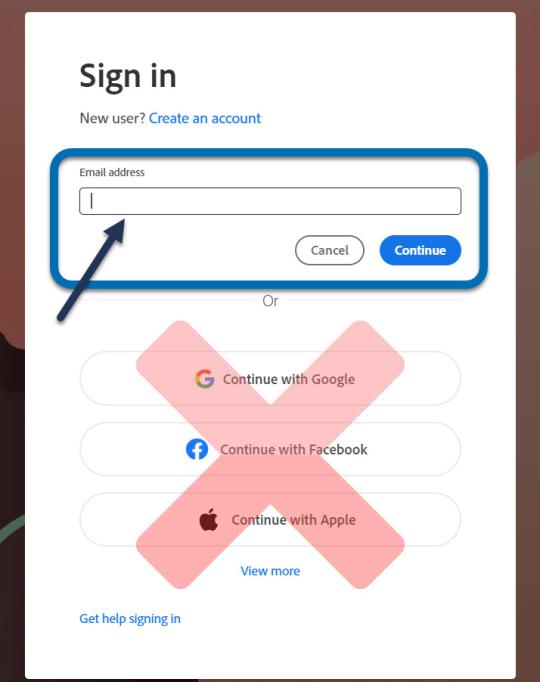
If you are not logged in, enter your @sonoma.edu email in the "Email address" box and click Continue.

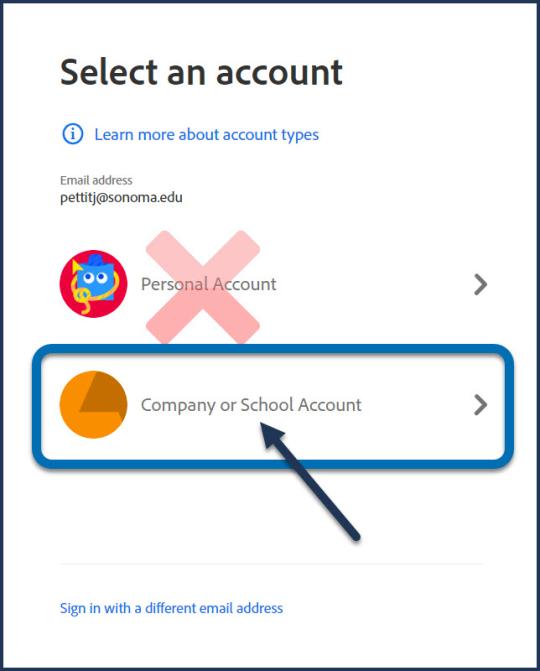
If prompted, select "Company or School account." (It won't work if you select "Personal Account" because the license is tied to your @sonoma.edu email account.)

- Log in with your SSU credentials on the Sonoma State Online Services page.
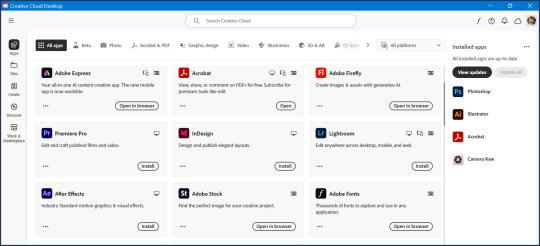
- Once Creative Cloud is open, go to the "Apps" section. Find the app you want to use. Click "Install," and Creative Cloud will install the app automatically.

- From Creative Cloud, you can also open any installed app or open online Adobe tools in a browser.

