SSU-SECURE Wi-Fi Access on Chrome OS
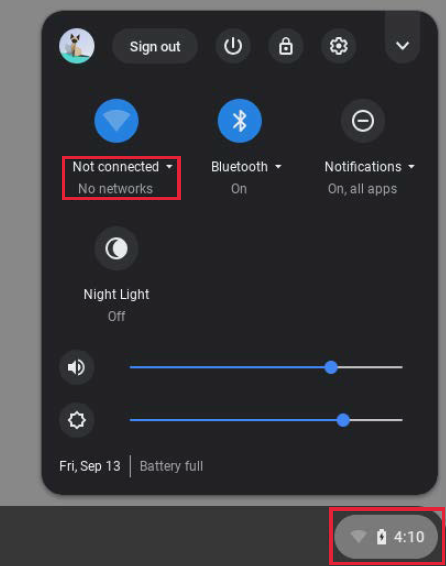
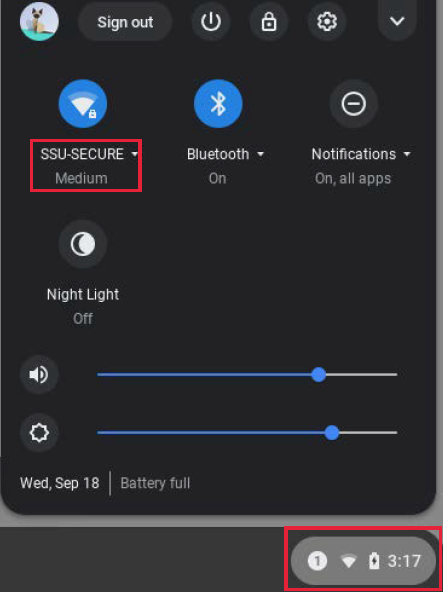
- At the bottom right of your screen, open the menu by clicking on the Wi-Fi symbol or by simply clicking on the time.
Click on Not Connected and make sure that Wi-Fi is turned on. (Note: If you see your Wi-Fi network name and a signal strength, your Chromebook is already connected to Wi-Fi.)
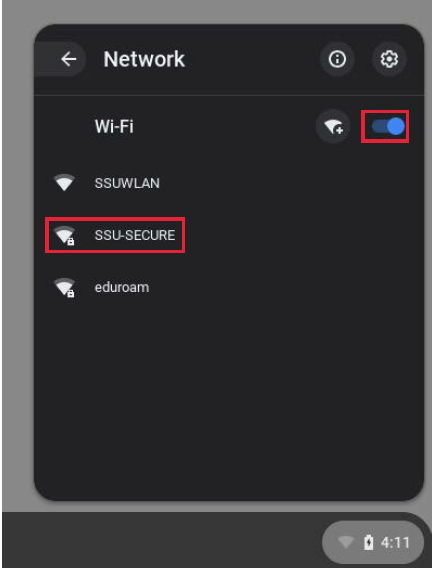
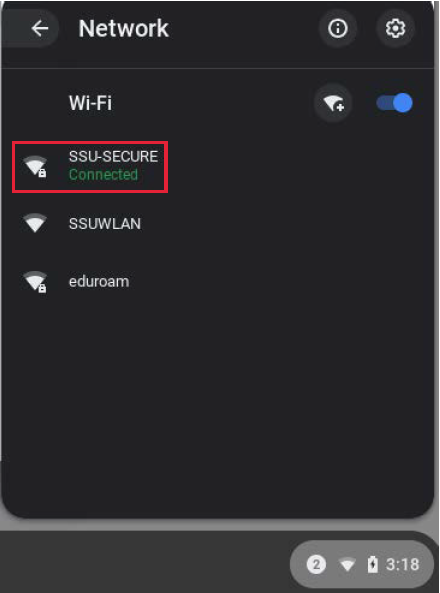
Find SSU-SECURE on the list and click on it.
On the Join Wi-Fi network screen that pops up, enter the following settings:
- EAP Method: PEAP
- EAP Phase2 Authentication: MSCHAPv2
- Server CA Certificate: Default
- Identity: SSU username
Note: It may be necessary to enter your username as SSU username@solar.sonoma.edu - Password: SSU password
- Domain: solar.sonoma.edu
Note: Only if requested or available: - Domain suffix match: sonoma.edu
Note: Only if requested or available: - Anonymous Identity: Leave blank
Note: If any value is present, remove it.
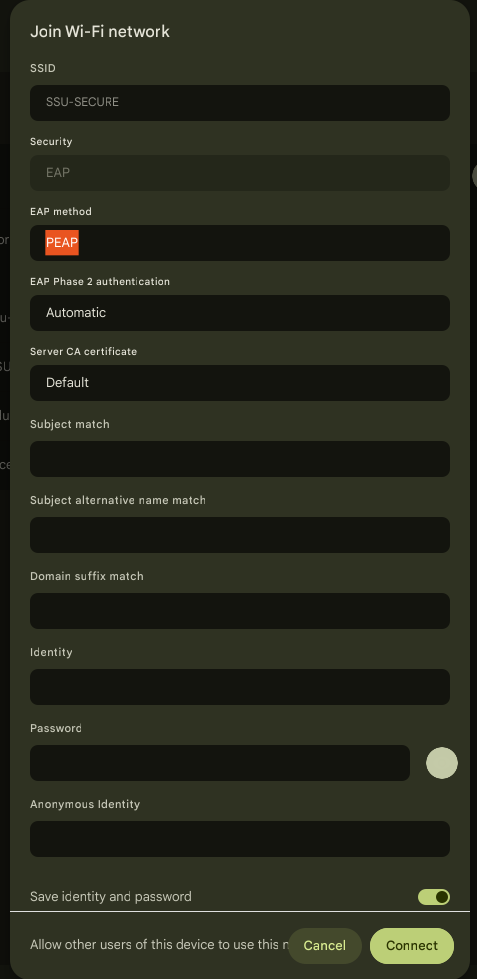
Click Connect. You should now be connected to SSU-SECURE!
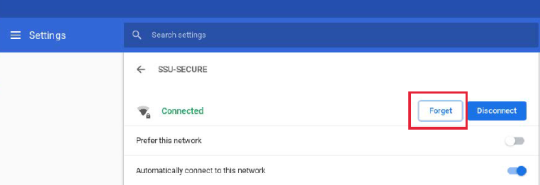
If you are having any issues connecting to SSU-SECURE or if your Chromebook says you are connected, but you do not have internet access, try forgetting the SSU-SECURE network.
Click on the time or Wi-Fi Symbol, then click on SSU-SECURE.
Click SSU-SECURE again to select the network.
Click on the Forget button. Repeat steps 1-5 above to reconnect.